


10 Solar Module Buying Tips for Global Buyers?
Buying a solar module across borders is more than comparing price per watt. Global buyers must assess performance, reliability, documentation, and supplier behavior together. A low quotation may hide weaker glass, uncertain cell quality, or expensive replacement risks. Small details matter.
Martin Green, a leading photovoltaic researcher, has said, “Solar photovoltaics is the fastest-growing energy technology in history.” That growth creates opportunity, but it also creates crowded markets and uneven product quality. Buyers should compare module efficiency, temperature coefficient, degradation rate, mechanical load ratings, and real operating conditions. A module performing well in a cool test laboratory may behave differently on a dusty rooftop or under intense heat.
This guide presents ten practical solar module buying tips for international purchasers. It examines manufacturer experience, independent testing, warranty language, certifications, traceability, packaging, shipping conditions, and after-sales support. Buyers should request current datasheets, third-party test reports, factory information, and clear warranty procedures. They should also confirm that products meet the destination market’s technical and safety requirements.
Numbers can mislead. A longer warranty is not automatically stronger protection. A familiar brand is not always the best fit for every climate, project design, or budget. Supplier audits and sample inspections require time, and sometimes buyers still discover weaknesses later. That uncomfortable possibility deserves attention. Good purchasing reduces uncertainty rather than pretending to remove it.
With careful comparison and documented questions, global buyers can choose a solar module that supports safer installation, predictable energy production, and more defensible long-term returns.
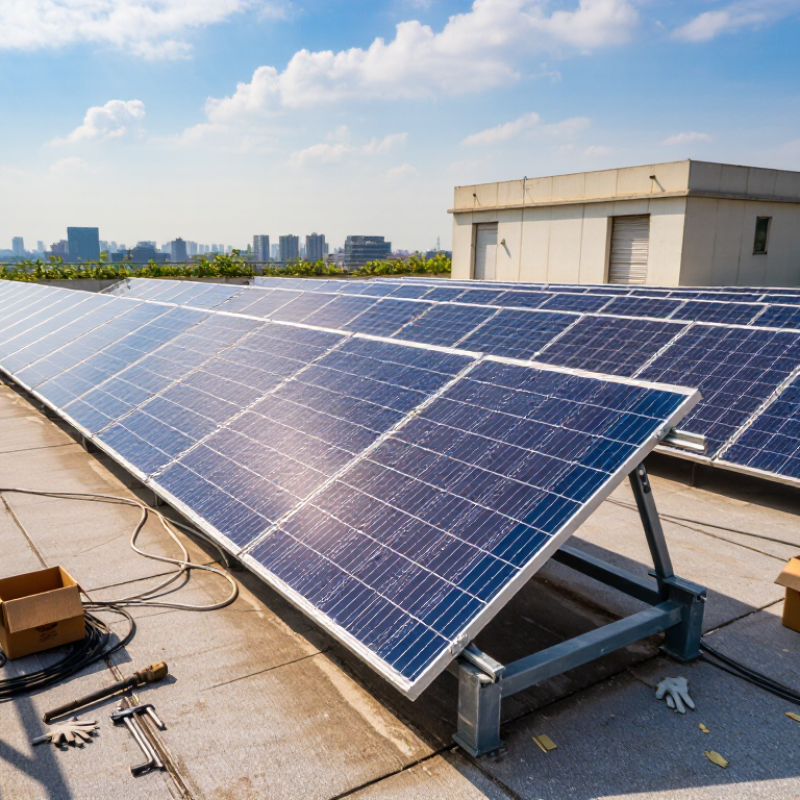
Table of Contents
[Hide]
Define Your Solar Energy Needs and Project Conditions
Before comparing solar modules, define the job they must perform. Record monthly electricity use, peak demand, operating hours, and future expansion plans. A cold storage site needs a different design from a weekend home. Check the roof’s usable area, slope, shading, access, and structural capacity. Even a small chimney shadow can reduce output across several module rows. Get a professional structural review before placing equipment.
Measure local climate conditions carefully. Coastal air, snow, dust, and high temperatures change material requirements. Ask for verified performance data under relevant test conditions, not only peak ratings. Review power tolerance, temperature coefficient, degradation terms, and warranty language. Also confirm local grid rules and certification requirements. These details affect safe connection and long-term reliability.
Match expected energy output with the project’s real budget and operating pattern. A higher-wattage module may not be best if its dimensions create unused roof space. Compare energy yield, installation labor, transport, and maintenance over the project life. Keep records of every assumption, including shading estimates and annual consumption. A spreadsheet can still be wrong. Recheck it after a site visit and a full-year load review. This may change the module size, mounting plan, or battery requirement.
| No. | Buying Tip | Project Condition to Define | Relevant Specification or Data Point | Why It Matters | Recommended Buyer Action |
|---|---|---|---|---|---|
| 1 | Calculate the required energy output | Annual electricity consumption, peak demand, available installation area, and target commissioning date. | Required system size ≈ Annual energy demand ÷ (specific yield × performance ratio). A practical performance ratio is commonly about 0.75–0.85, depending on the site. | Module quantity should be based on energy production, not only on the nominal wattage of one panel. | Use at least 12 months of electricity bills or a verified load profile, then request a site-specific yield simulation. |
| 2 | Match module power to the available area | Roof dimensions, ground-mount boundaries, access paths, shading setbacks, and maintenance clearances. | Current utility-scale and commercial modules commonly offer approximately 400–700 W per module, with module efficiencies often around 19%–24%. | Higher power does not always mean better value if module dimensions reduce layout efficiency or complicate installation. | Compare total installed capacity, module dimensions, spacing, and usable area rather than comparing wattage alone. |
| 3 | Evaluate the local solar resource and climate | Solar irradiation, ambient temperature range, humidity, rainfall, snow, wind, dust, salt exposure, and hail risk. | Review long-term irradiation data and the module’s temperature coefficient. A typical power temperature coefficient is approximately -0.20% to -0.40% per °C above the rated cell temperature. | Hot climates reduce instantaneous output, while dust, humidity, and salt can accelerate soiling or material degradation. | Ask for a production model using local weather data and confirm whether the module design suits coastal, desert, tropical, or cold conditions. |
| 4 | Check electrical compatibility | Inverter input voltage range, maximum current, string length, system voltage, and operating temperature. | Confirm the module’s Voc, Vmp, Isc, and Imp under standard test conditions. Common maximum system voltage classes are 1,000 V or 1,500 V DC. | Incorrect voltage or current matching can reduce energy yield, create safety risks, or prevent the inverter from operating correctly. | Have the final string design checked at both the lowest expected temperature and the highest expected operating temperature. |
| 5 | Select the appropriate module technology | Roof load limits, partial shading, bifacial ground conditions, visual requirements, and temperature environment. | Options may include monofacial or bifacial modules, half-cut cell layouts, and n-type or p-type cell technologies. Bifacial gains depend strongly on albedo, mounting height, row spacing, and site layout. | The most advanced technology is not automatically the most economical for every roof or ground-mount project. | Compare expected lifetime energy yield and installed cost using a project-specific simulation instead of relying only on nameplate efficiency. |
| 6 | Verify mechanical load suitability | Local wind speed, snow load, mounting orientation, clamp zones, tracker use, and installation method. | Typical module load ratings may be approximately 2,400 Pa front load and 4,000–5,400 Pa rear load, but the exact rating depends on the product and mounting configuration. | A module rating is valid only when the mounting structure, clamp positions, fasteners, and installation instructions are also compliant. | Obtain structural calculations for the actual site and follow the permitted clamp zones and torque values specified in the installation manual. |
| 7 | Confirm durability and environmental protection | High humidity, ammonia exposure, salt mist, severe temperature cycling, dust, sand, and frequent wetting. | Look for recognized qualification testing such as IEC 61215 and IEC 61730, plus relevant salt-mist, ammonia, dust, or PID-resistance evidence where applicable. | Standard certification confirms baseline design qualification, while project-specific environmental testing may be needed for harsh locations. | Request complete certificates, test reports, product construction details, and confirmation of suitability for the project’s environmental category. |
| 8 | Compare degradation and warranty terms | Required operating life, financing period, expected resale value, and long-term energy yield. | Many current products provide a first-year degradation limit of about 1% and subsequent annual degradation of roughly 0.25%–0.5%; exact terms vary by product. | Lower degradation can improve lifetime energy production, but warranty wording and claim procedures are as important as the percentage. | Review the product warranty, performance warranty, exclusions, transferability, measurement method, and remedy provisions before ordering. |
| 9 | Assess logistics and installation constraints | Port location, road access, container capacity, lifting equipment, module weight, dimensions, packaging, and local labor capability. | Large-format modules can exceed approximately 2.2 m in length and weigh more than 25 kg. Packaging and manual-handling requirements should be checked before shipment. | Transport damage, difficult handling, and restricted access can increase the total installed cost even when the module price is low. | Request packing specifications, pallet quantities, container loading plans, handling instructions, and a delivery inspection procedure. |
| 10 | Use total cost of ownership, not only purchase price | Module cost, freight, duties, installation labor, balance-of-system costs, cleaning, replacement risk, financing, and expected energy revenue. | Compare cost per watt, estimated lifetime energy yield, degradation, operating costs, warranty coverage, and expected levelized cost of electricity. | A lower unit price may result in a higher lifetime cost if the module has lower yield, higher degradation, difficult logistics, or limited warranty support. | Build a project-specific financial model and compare suppliers using the same assumptions for energy yield, financing, taxes, and operating costs. |
Related Posts
-

Top China Best Solar Module Suppliers for Global Buyers?
-
How to Choose the Right Solar Module for Global Sourcing
-
The Best Residential Solar Panels of 2026 for Your Home?
-
Top 10 Benefits of Residential Solar Panels for Homeowners?
-

China Best Solar Panels for Global Buyers What to Know?
-
What Are the Top Rooftop Solar Panels for Global Buyers?
© 2025 Australian Premium Solar