How to Choose the Best Solar Motion Flood Light
A Solar Motion Flood Light can make a dark driveway feel safer without adding wires or a large electricity bill. But choosing one is not as simple as comparing brightness claims. A light may look powerful on its box and still leave the gate in shadow. Panel placement, battery capacity, sensor range, and weather resistance all affect daily performance.
Energy-efficiency expert Amory Lovins is often credited with the reminder, “The best energy is the energy we don’t use.” That idea matters here: the right light should provide useful coverage while conserving stored power. A motion sensor that triggers for passing cars can drain a battery faster than one aimed carefully at a path or entryway. Small setup details count.
This guide explains how to compare brightness, detection angles, battery specifications, and solar-panel design. It also considers installation height and the available sunlight around your home. Look beyond impressive packaging. Check what the product specifications actually say, and think about where the light will sit on a cloudy week. One detail is easy to miss: the brightest option may not be the most dependable one. A little doubt is healthy. The best choice is the fixture that fits your space, lighting needs, and local conditions.
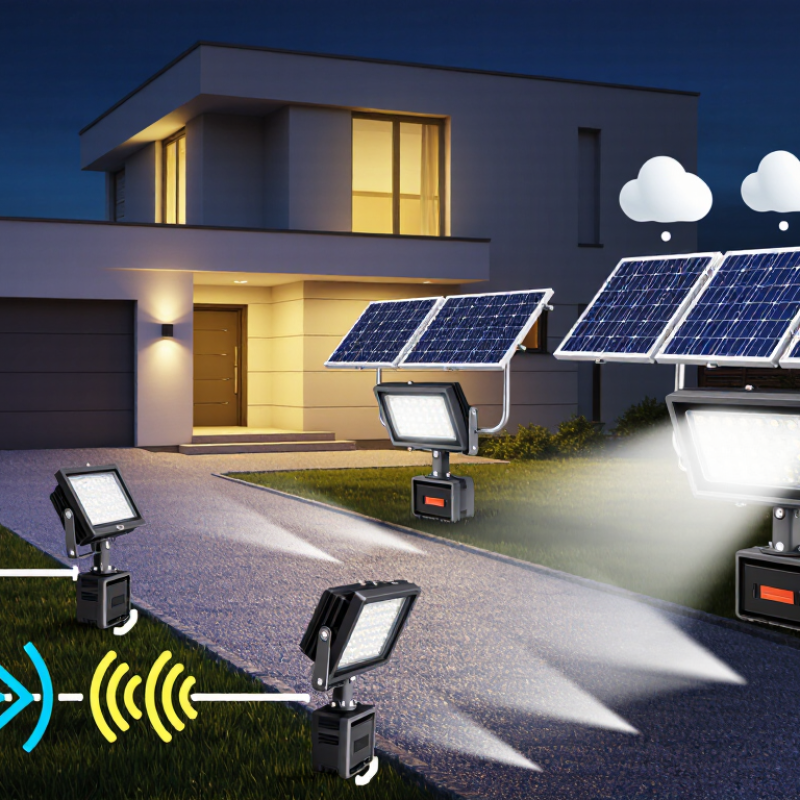
Define the Area to Light by Lumens, Beam Angle, and Mounting Height
Start with the area, not the flood light’s headline lumen number. Lumens measure total light output, but useful brightness also depends on beam angle, mounting height, and obstructions. A narrow beam may create a bright patch on a driveway while leaving the gate dim. A wider beam can cover a patio more evenly, though its edges may appear softer.
Measure the space and note where people walk, park, or enter. Mounting a light higher usually spreads its beam across more ground, but can reduce brightness at any one spot. Mounted lower, it may illuminate a doorway well and leave nearby corners dark. I’ve seen simple layouts look fine on paper, then reveal awkward shadows from eaves or tree branches. It is worth checking the coverage after installation and adjusting the angle.
Tips: Compare the beam pattern with your measured area, not just the lumen rating. Aim the sensor and light separately if possible. Test after dusk; daylight can hide uneven coverage. A small gap in your plan may matter.
How to Choose the Best Solar Motion Flood Light: Define the Area to Light by Lumens, Beam Angle, and Mounting Height
| Area to Light | Suggested Light Output | Suggested Beam Angle | Typical Mounting Height | Approximate Beam Width at Ground | Practical Selection Tip |
| Doorway or small entrance | 300–600 lumens | 80°–100° | 6–8 ft (1.8–2.4 m) | 8–17 ft (2.4–5.2 m) | Choose a narrower beam when the light should focus on a door, steps, or a short path. |
| Porch or small patio | 500–900 lumens | 90°–110° | 7–9 ft (2.1–2.7 m) | 14–23 ft (4.3–7.0 m) | A moderate beam can cover a seating area while limiting light spill toward neighboring spaces. |
| Single-car driveway | 800–1,500 lumens | 100°–120° | 8–10 ft (2.4–3.0 m) | 19–35 ft (5.8–10.7 m) | Position the fixture to illuminate the driveway entrance and walking route, not just the vehicle. |
| Side yard or garden path | 600–1,200 lumens | 100°–120° | 8–12 ft (2.4–3.7 m) | 19–42 ft (5.8–12.8 m) | For long, narrow spaces, consider two lower-output fixtures rather than one very wide beam. |
| Two-car driveway or broad patio | 1,200–2,000 lumens | 110°–130° | 10–14 ft (3.0–4.3 m) | 29–56 ft (8.8–17.1 m) | A wider beam increases coverage, but may need more lumens to maintain useful brightness across the area. |
| Large yard edge or open parking area | 1,800–3,000 lumens | 120°–140° | 12–16 ft (3.7–4.9 m) | 42–90 ft (12.8–27.4 m) | Check the light’s stated output and aiming limits; a broad footprint does not guarantee even illumination. |
Planning note: Beam widths are approximate geometric footprints on level ground, calculated from mounting height and beam angle. Actual useful coverage varies with the fixture’s optics, aiming, obstructions, and light output. Solar performance also depends on sunlight, battery capacity, and operating settings.
Compare PIR Coverage: 120° Is Common, but Detection Range Varies
A 120-degree PIR sensor is common on solar motion flood lights, but its coverage angle tells only part of the story. It describes the width of the sensor’s view, not how far away it can reliably detect movement. One light may respond across a broad area nearby, while another may miss a person several meters away. Check both the stated angle and detection range before comparing models.
Range can change with movement direction, mounting height, and surrounding conditions. PIR sensors often detect movement across their view more readily than movement directly toward them. A fence, shrub, or warm surface may also affect what the sensor registers. Treat advertised distances as test conditions, not guarantees. The difference matters. A light above a garage door may need a longer range than one aimed at a narrow garden path. It is easy to focus on the angle and overlook the actual approach route; I would reconsider that assumption before choosing.
Tips: Walk through the area at dusk and note where people enter and cross the sensor’s view. Aim the light toward that path, then test its response from several distances. Adjust the angle if it triggers too late or misses side movement. A few minutes of testing can reveal more than the headline specification.
How to Choose the Best Solar Motion Flood Light
Compare PIR coverage: 120° is common, but detection range varies.
The bars show the theoretical width of a 120° field of view, calculated as 2 × distance × tan(60°). Actual PIR detection depends on the light’s sensor range, installation, and movement across the sensor’s field of view. Check the product specifications for its rated detection distance.
Size the Solar Panel and Battery for Local Peak-Sun Hours and Runtime
Size the panel and battery from winter conditions, not the sunniest month. NREL’s National Solar Radiation Database provides hourly solar-irradiance data, while its PVWatts tool estimates photovoltaic output by location. Use those resources to check the site’s weaker-season sunlight. A shaded eave or a panel facing away from the midday sun can cut charging sharply. Peak-sun hours are an average, not guaranteed charging time.
Estimate nightly energy before choosing hardware. For example, a 20-watt light running for 30 seconds across 100 activations uses about 17 watt-hours, before standby losses. Three nights of backup require at least 51 watt-hours delivered. If you plan to use only 80% of battery capacity, that means roughly 64 watt-hours of nominal storage. A 20-watt panel receiving four peak-sun hours yields 80 watt-hours before losses; allowing 30% for charging and conversion losses leaves about 56 watt-hours. That may be tight. Add panel capacity or reduce runtime.
Test the real setup. Count nighttime activations, include cloudy-day recovery, and check whether nearby trees cast winter shade. Manufacturer runtime claims can miss your actual traffic pattern. I would size with a margin, then review performance after a week; even a careful estimate can be wrong.
Verify Weather Resistance: IEC 60529 IP65 Is Dust-Tight and Water-Jet Resistant
When choosing a solar motion flood light, check the enclosure’s IP rating, not just its brightness. IEC 60529 IP65 means the housing is dust-tight and protected against water jets under defined test conditions. The first digit, 6, indicates dust protection. The second, 5, indicates resistance to water jets. That distinction matters. IP65 does not mean the light can be submerged or sprayed with a pressure washer.
Look closely at the cable entry, lens edges, and battery compartment. These joints can be vulnerable if a cover is loose or a seal is damaged. A rating applies to the tested product configuration, so follow the installation instructions and keep the unit assembled as intended. A sheltered wall may still be exposed to wind-driven rain, while a spot beneath a deep eave may stay much drier.
It is tempting to treat IP65 as a promise that no water will ever get inside. It is not. Seals can wear, screws can loosen, and a poorly chosen mounting angle can leave water sitting around a joint. After installation, check the housing for cracks and make sure covers sit flush. Small details count. A quick inspection after rough weather is sensible, even if it feels a little cautious.